Your first dynamic list
The documentation applies to: v0.8.0
What is Dynamic List?
A brief of Dynamic List is a section type. It helps you can build quickly a Grid Data.
These steps below will help you to create one page with dynamic list
Step 1: Go to Dynamic List Builder Page
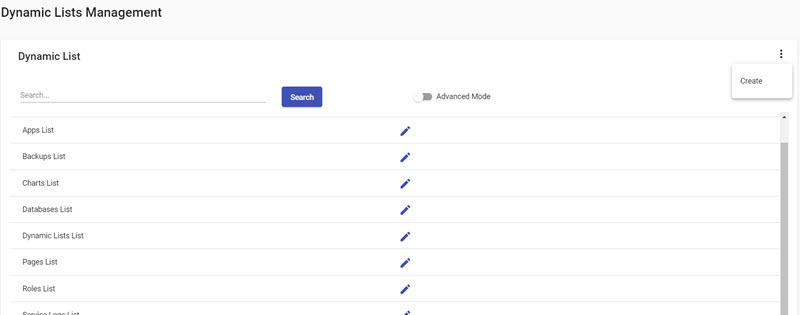
After you login successfully with default admin / @Dm1n!. On Apps List page, you choose a menu by clicking on a left menu icon on Header. Then clicks on Page Settings, and clicks on Dynamic List Management.
Then you choose  on the right side of list, it will display a Create button, so click on this.
Step 2: Populate columns
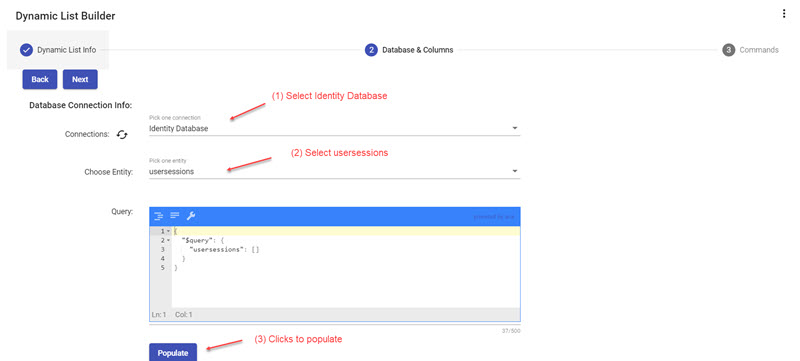
On Dynamic List Info section, you enter a text "User Sessions List" then click on "Next" button
On Database Connection Info section, choose "Identity Database" on Connections field, then choose "usersessions" on *Choose Entity" field.
Tip
If you don't see "usersessions" option, please press on "refresh icon" next to "Connections"
After that, you click on "Populate" button to generate columns
Step 3: Create Dynamic List
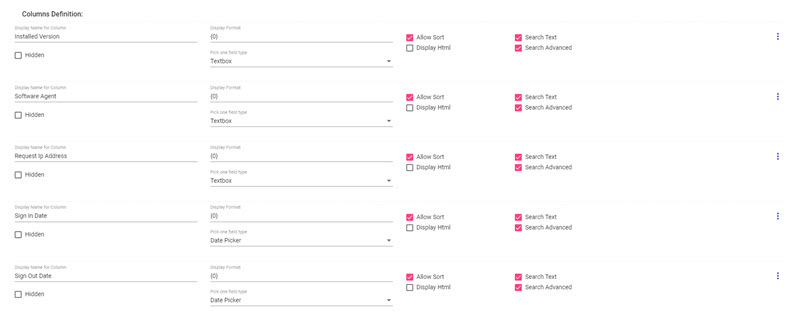
If these columns appear as screenshot above, so you can save this dynamic list. Clicks on , then "Save" button.
You will see you redirect to Dynamic List Management page and a save successfully toast.
Step 4: Connect with a page
Step 4.1: Create a page
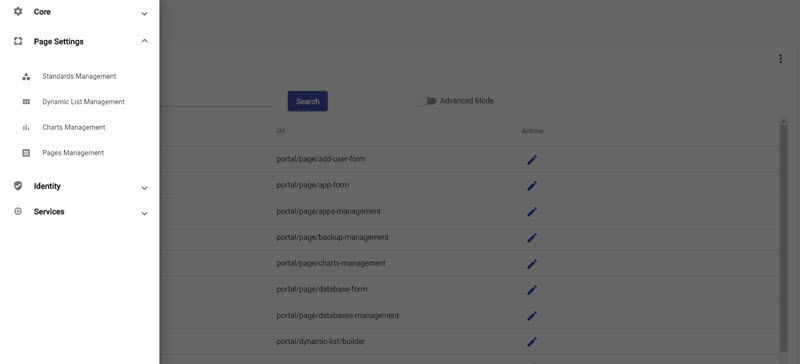
We have one section component which is ready to intergate a page. Now open a left menu, choose Page Settings, then clicks on Pages Management.
On Pages Management, clicks on then clicks on Create
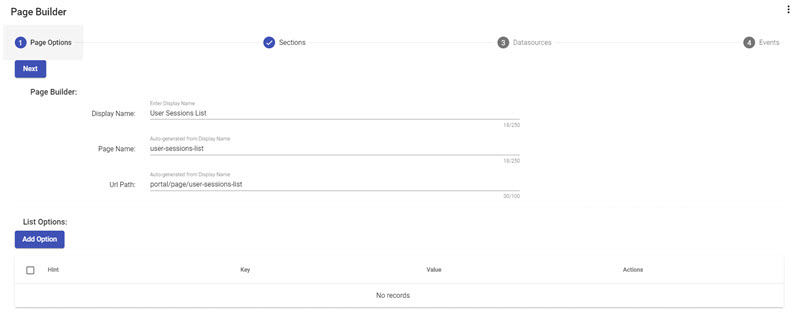
Step 4.2: Fill out Page Options
On a first step, you should fill out a Display Name. So you should enter a text User Sessions List
Tip
Page name and url will be auto-generated according to your Display Name.
There are nothing here you should warn, presses on Next button to move Sections step
Step 4.3: Add Section
Following this screenshot below to help add a section
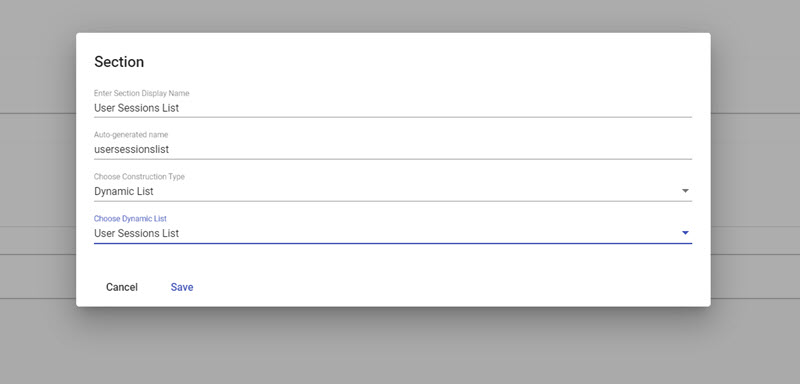
This step will open up a Section dialog. You need to enter some infos:
- Enter User Sessions List on Display Name field
- Choose Dynamic List value as default on Construction Type field
- Choose User Session List which you have created on a step 4 on Choose Standard
After that, presses on Save button to close a dialog
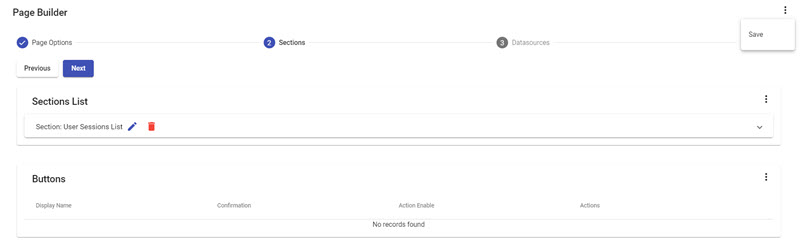
Step 4.4: Save a creating page
Now, there are nothing to do here. Just save your page by clicking on Save button of .
Step 5: Test a page
After a page created, on Pages Management, type User Sessions on Search textbox to find your page, then presses Search button
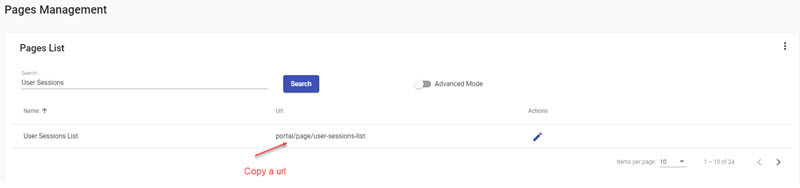
You just highlight an url and copy this.
Now look on a browser's url, replace a string portal/page/pages-management by your copied url. Then press on Enter to redirect to your page.
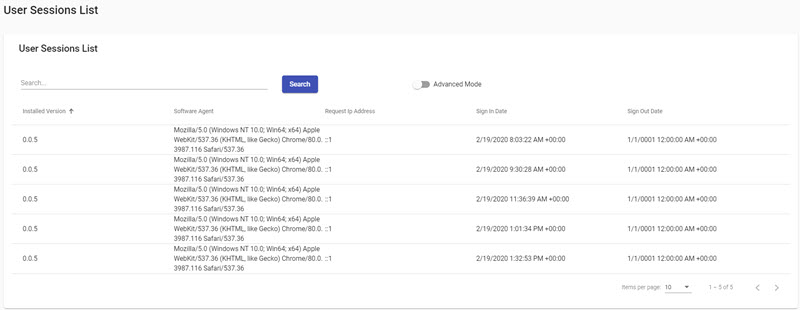
If you can reach here, so you test successfully a page.
Congratulation! You have created one page by LET Portal Mechanism. We will guide you to work with two remaining components that are Standard and Chart.