Your first app
The documentation applies to: v0.8.0
Step 1: Go to App Builder page
After you login successfully with default admin / @Dm1n!. On Apps List page, clicks on  to show "Create" button. Click on that to redirect to App Builder page.

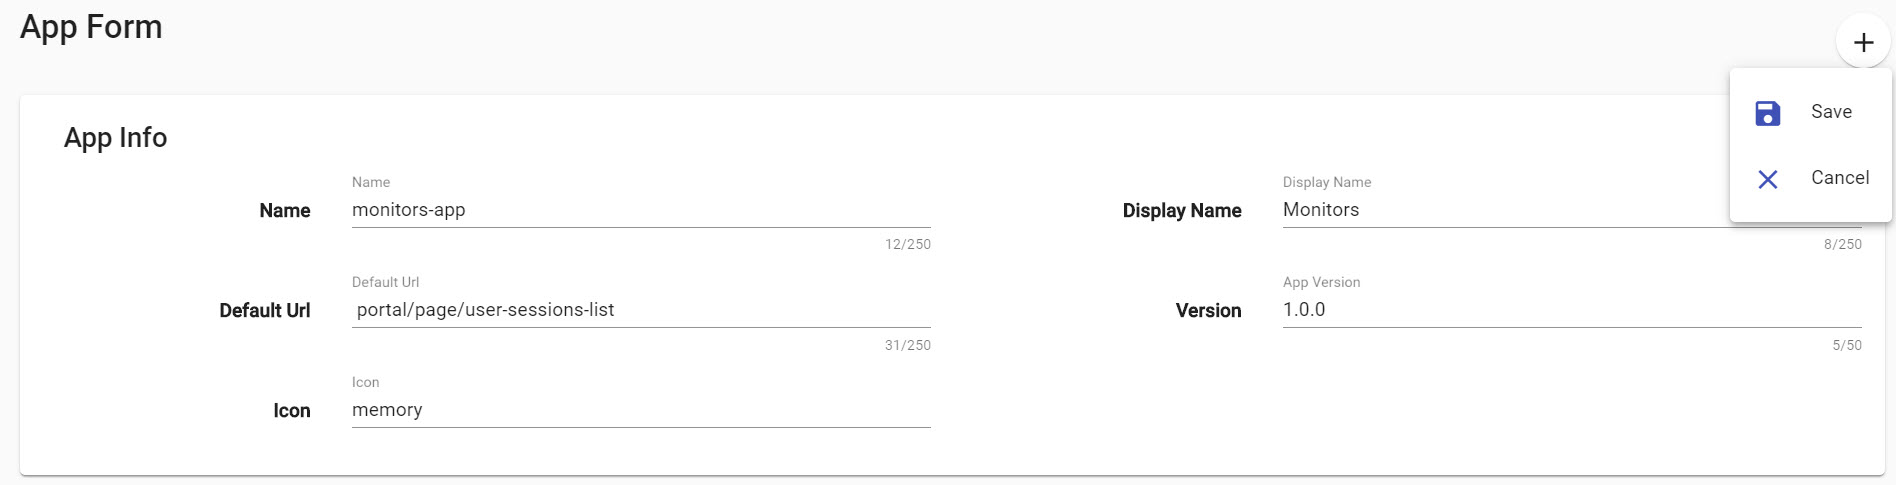
Step 2: Create an app
You need to fill out all fields with these values below:
- Enters "monitorsapp" on Name field
- Enters "Monitors" on Display Name field
- Enters "portal/page/user-sessions-list" on Default Url field
- Enters "1.0.0" on Version field
- Enters "memory" on Icon field
Then you clicks on "Save" button to create an app
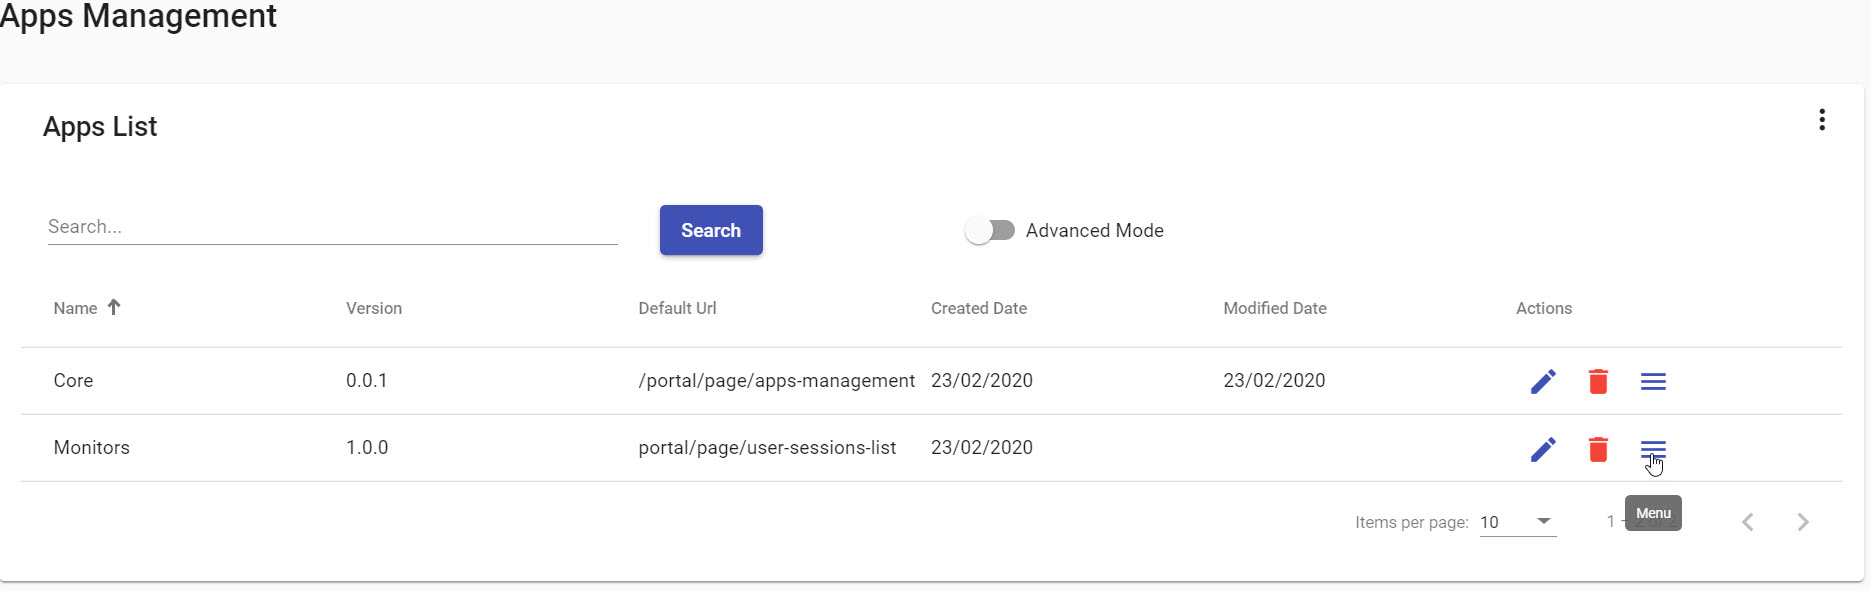
Step 3: Create a menu for new app
On Apps List page, you click on "Menu" button on the same row of your created app.
On Menu Builder page, you won't see anything here because no menu has been added. Now you click on "Add menu" button on the left side.

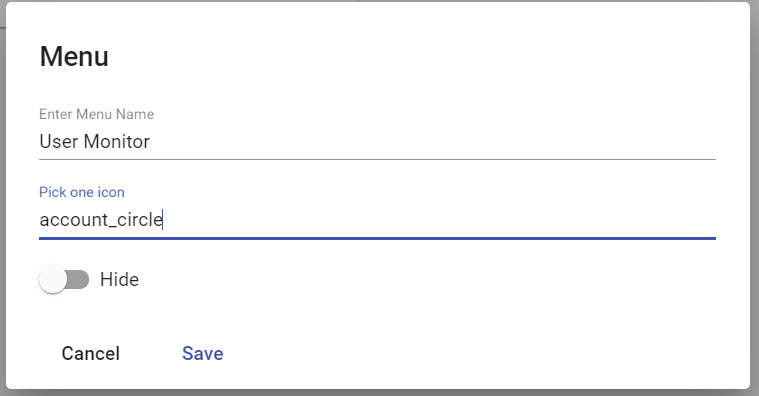
On a dialog, you enter "User Monitor" on "Menu Name" field and choose "account_circle" on "Icon" field. Then you click on "Save" button
Next, you need to create at least one sub menu. Click on "plus" icon next to your new menu, then click "Add child"
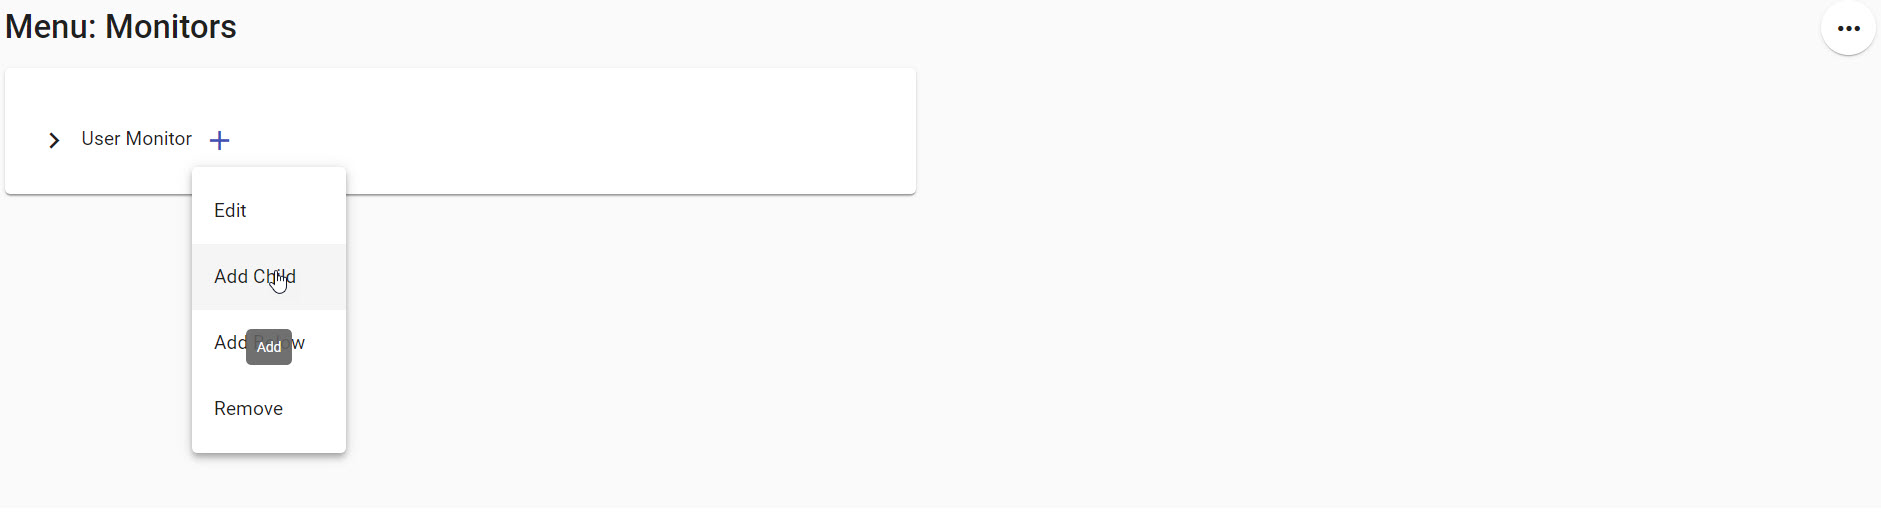
On a dialog, you choose "User Sessions Monitor" on "Pick one url" field and choose "queue_play_next" icon on "Icon" field. These fields will be auto-generated. Save this sub menu by clicking on "Save" button.
Now you continue to click on "plus" icon on the same row of "User Sessions Monitor", click on "Add Below" to add "User Sessions List" node (you can choose any icon)
Later, you need to save a menu by clicking on "Save" button on the left side.

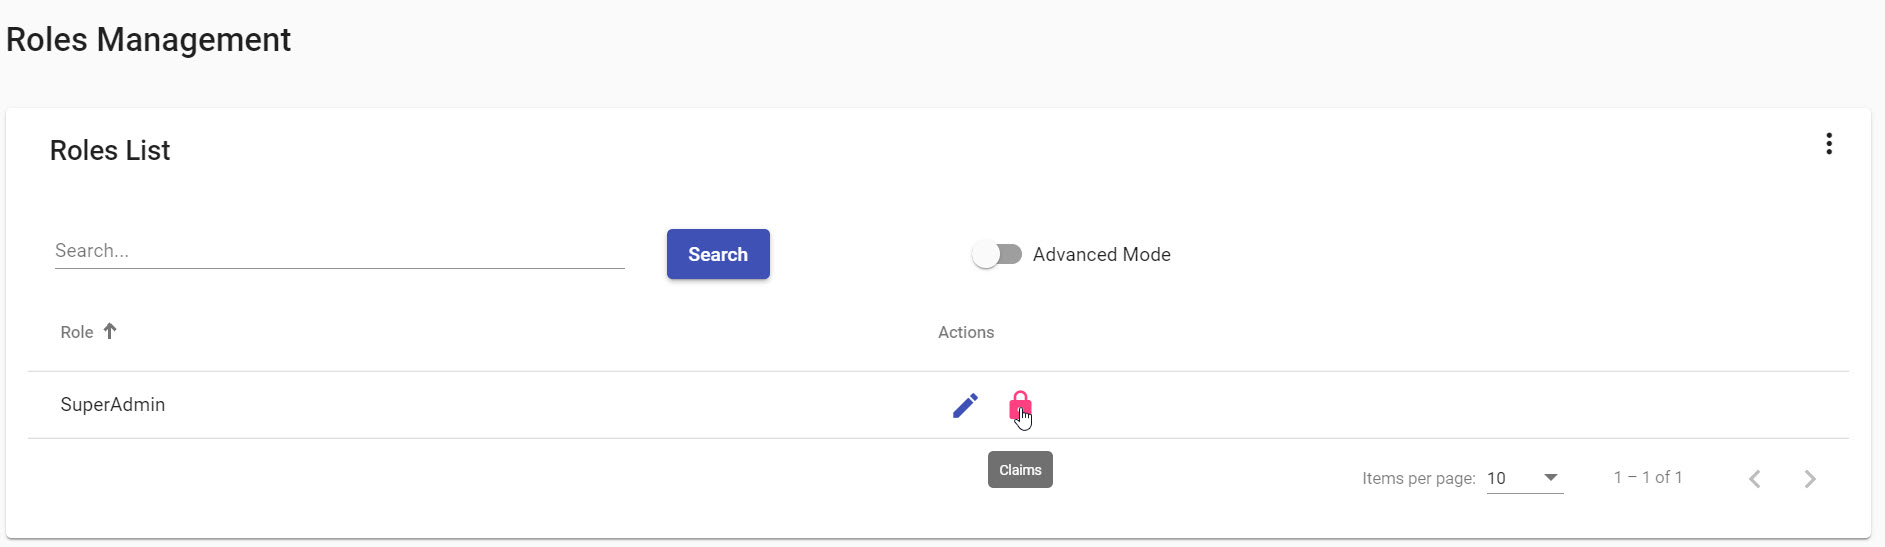
Step 4: Assign an app to your role
Click on left menu, under Identity, choose "Roles Management" to redirect to "Roles Management" page.
Click on "Lock" icon on the same row of "SuperAdmin" role.
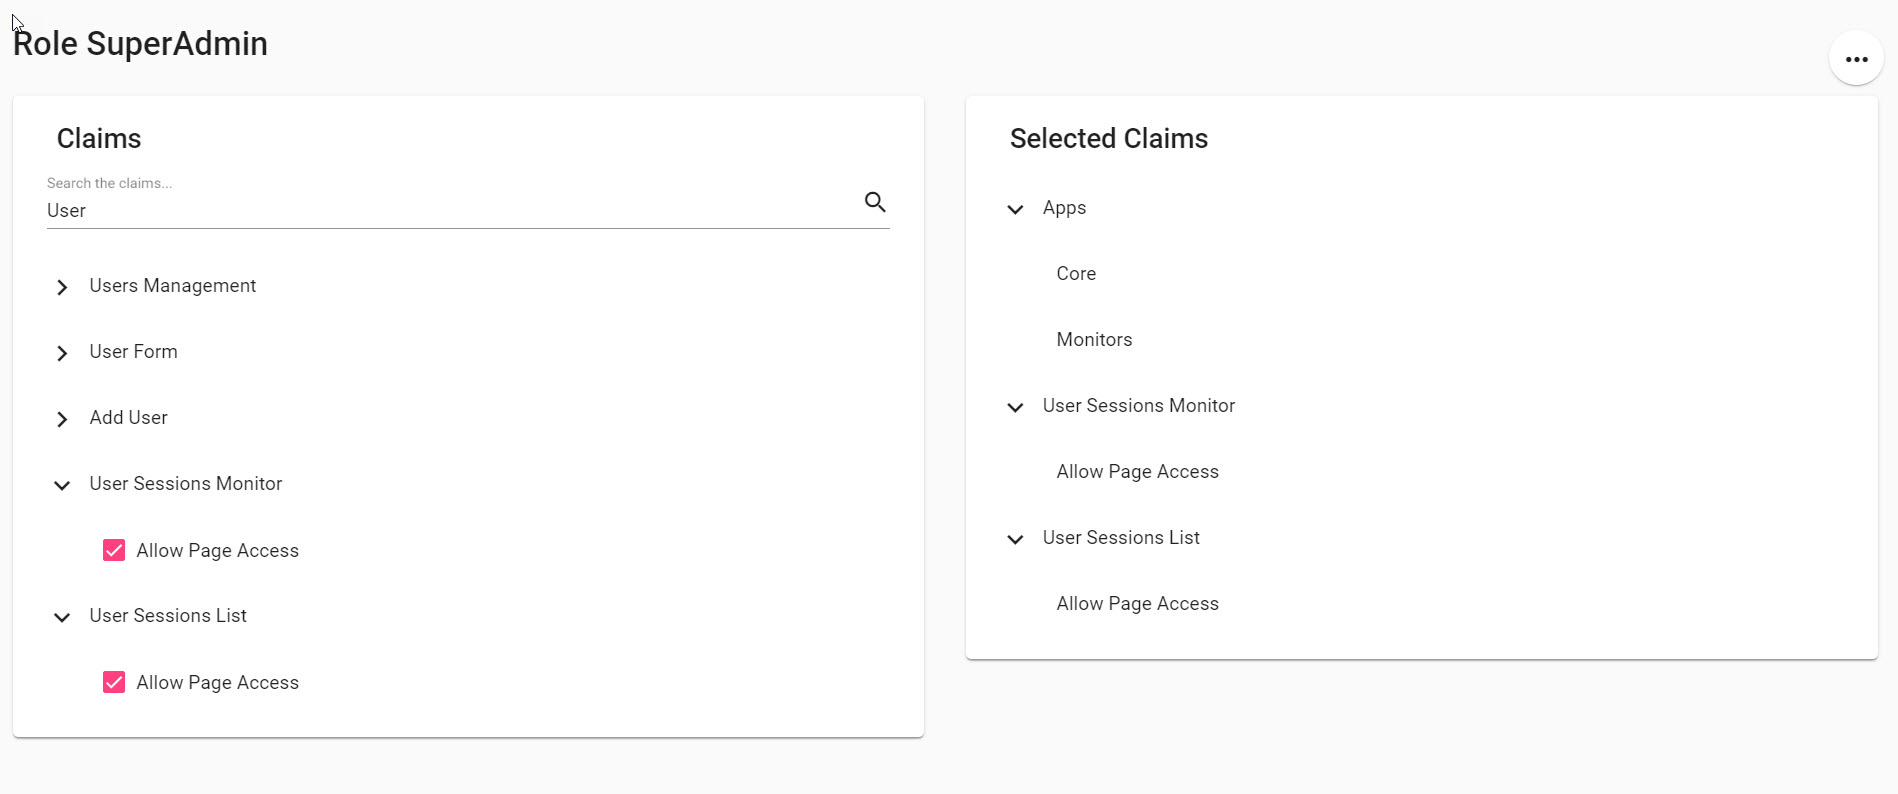
On Role Claims page, you need to tick on "Monitors" under Apps node on a left Claims tree.
Next you need to enter "User Session" on "Search" textbox, tick on "Allow Page Access" on two page "User Sessions Monitor" and "User Sessions List". After that, click on "Save" button on the left side.
Step 5: Verify new app
Now you need to sign out and then sign in again. You will see a new app after you sign in successfully.
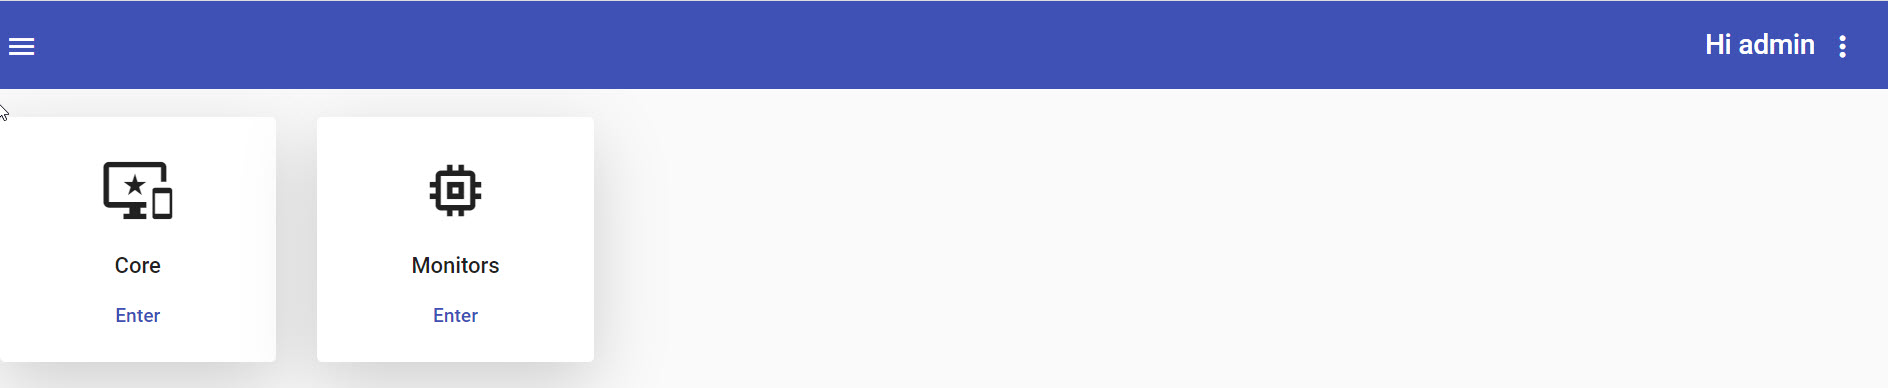
Congratulation! You learned how to create one app and how to integrate with Role-Based Authorization