Page
The documentation applies to: v0.8.0
Preparation knowledge
Before you read, please ensure you must complete this step and concepts. This step will help you to a basic knowledge about Page.
Warning
We assume you have an experience to work with LET Portal, at least login/menu and how to redirect. We just provide some short steps for letting you know the main points
Page Info
Ignore some common fields, we just focus on two things: Options and Claims
Options
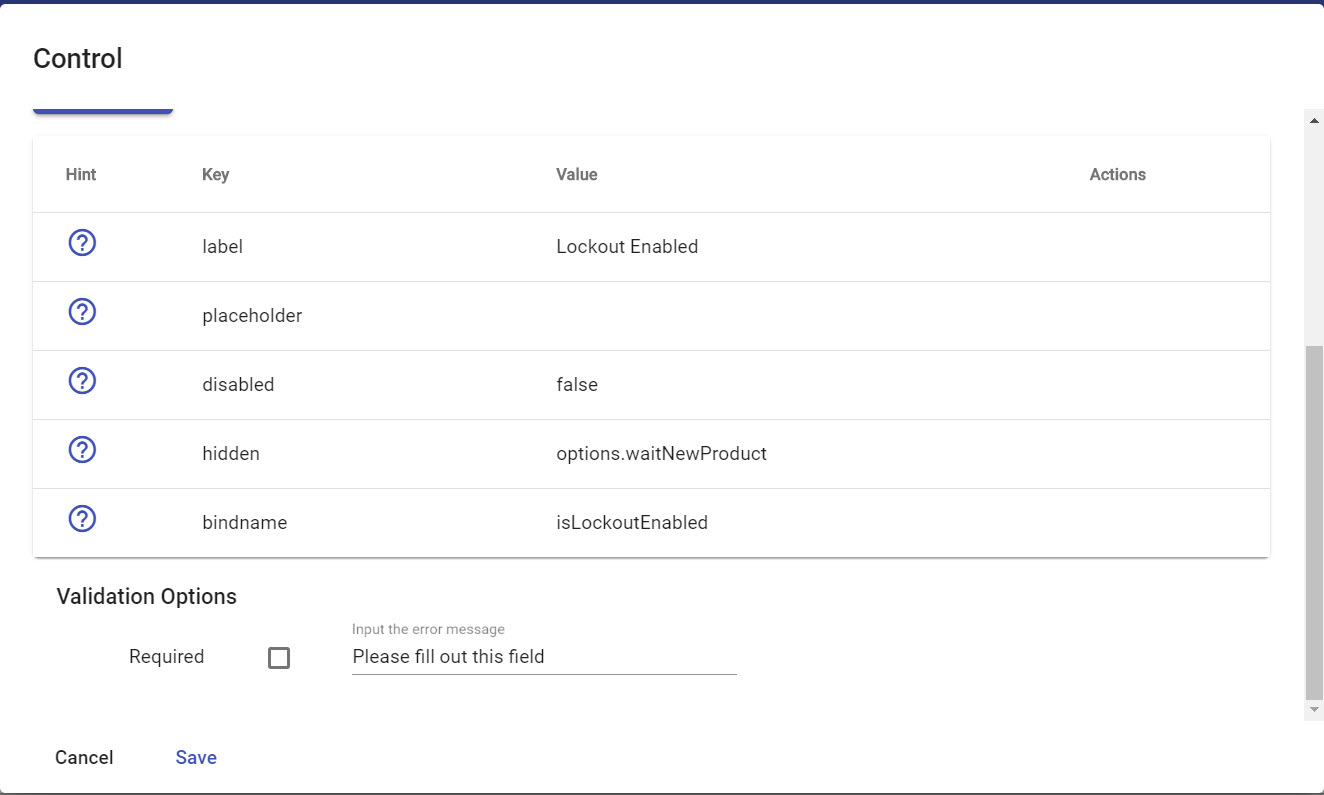
By default, we don't have any option. You need to add key/value for one option. An ideal of option is a feature toogle. So let's discuss about use-cases of Options. For example: you get one requirement for hiding some controls until we have another product will be released. So you just add one key/value is "waitNewProduct"/"true"
Then on "hidden" option of control, you just type an expression options.waitNewProduct
Expression
Please note you can access Page Options via options on expression field
Claims
Claim, same as many systems, is a property of one identity. Claims-based authorization is very popular nowaday, it is helping many enterprise systems to deal with Security Model. However, LET Portal is building for small company which has a few people. In this situation, we choose a typical authorization model is Role-based Authorization.
TL;DR: Role-based authorization is an authorization mechanism which defines a relationship between user (identity), role and claims (or permissions on some old systems). User can has multiple roles. Role has multiple claims and each claim contains ClaimValue and ClaimType.
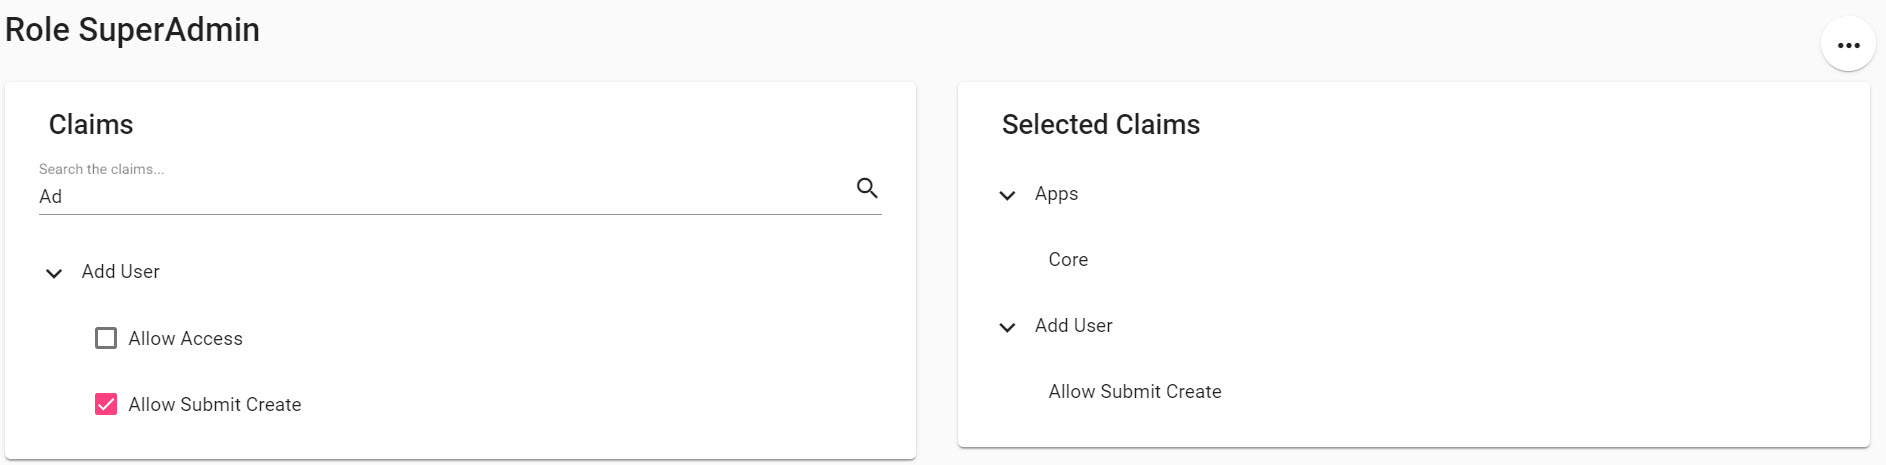
On LET Portal, Claims on Page are a group of Boolean claims. They indicate some claims which a role MUST contain (with value is true/false)
By default, each page always has one claim is allowaccess which indicates this role can access this page. All adding claims are custom. For example: we add one claim as allowsubmit

Now all roles has false value when role accesses this page via url. If you want to set true value, you go to Role Claims page via Roles Management page.
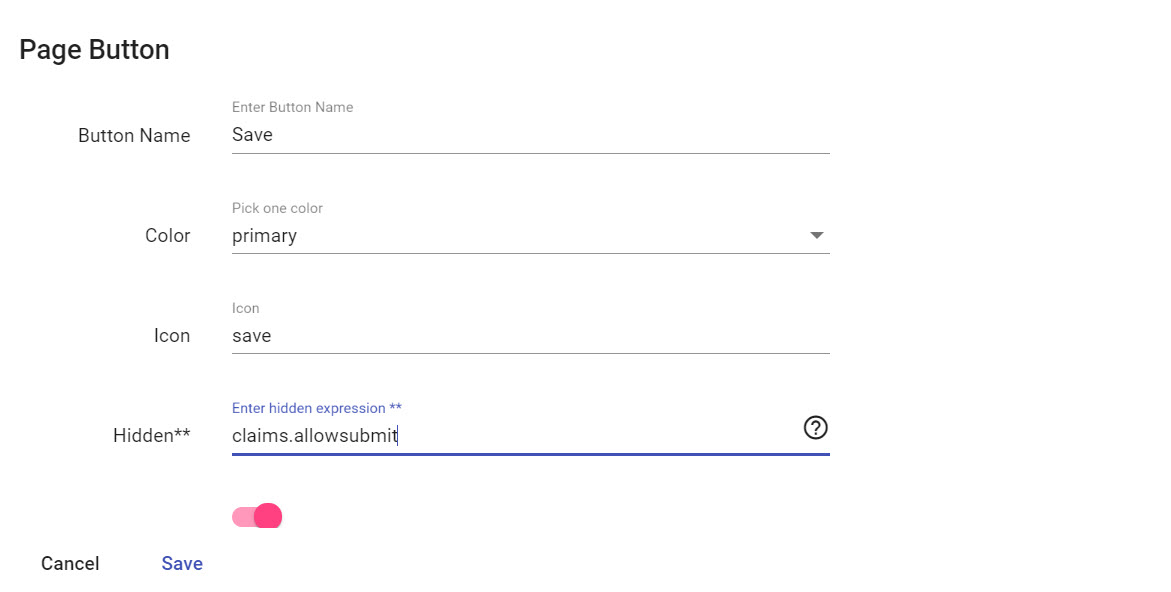
Then you want to apply this, you just type claims.allowsubmit on any expression field.
Expression
Please note you can access Page Claims via claims on expression field
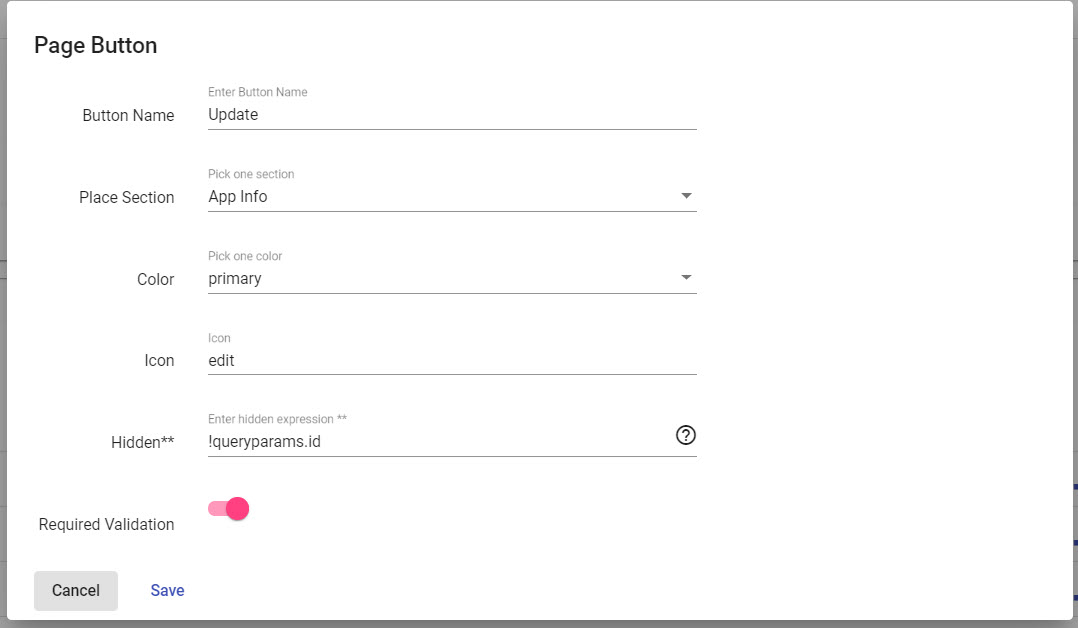
Buttons
Same as Dynamic List button, but we still highlight some important parts.
Button Info
- Hidden**: You can enter an expression on this field. If it is empty, means it is
false - Required Validation: If it is enable, all sections must be valid before proceeding
Button Options
- Confirmation Options: It will pop-up a dialog Yes/No, if you choose
Yes, an action will be triggered - Action Options: Two types are Execute Database and Http Service, same with Dynamic List
- Notification Info: Toast message for notifying user about an execution result
Button Routes
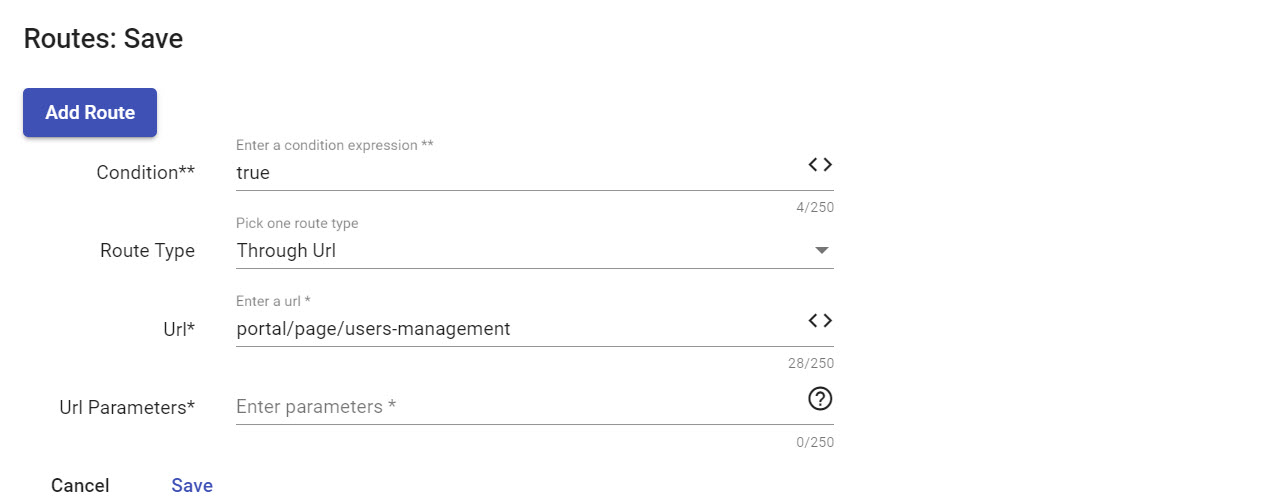
Different with Dynamic List's button, each button has many routes. So why do we want to have many routes? Let's take a look on this scenarios: Imagine you stay on QuickQuote page, you can choose User paid via Visa or User paid via Paypal on Payment type. So there are two cases and you need to redirect a correct page according a chosen.
- Route (1): if
data.paymentType === 0, then redirect toportal/page/payment-visa - Route (2): if
data.paymentType === 1, then redirect toportal/page/payment-paypal
Now you are clearly a reason why one button can have multiple routes. You should put your condition on Condition field.
Redirect button
You can ask why you don't see any option for Redirect Action Type on Action Options. So you just disable Action Options and this button will work as Redirect button
Attach to Section
Appliest to: v0.6.0 and later
What happened if you have two different sections in one Page? So you want to have two buttons which stay on correlate section. Easiest way is you just choose Place Section on button to attach it to section.
And the result will look like below
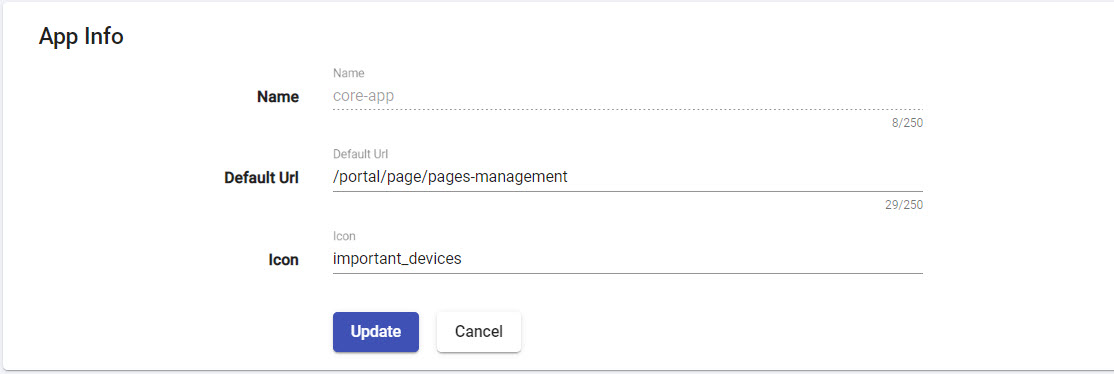
Seperation of validation
When you assign button to specific section, that means Required Validation option only apply to section's scope instead of whole page.
Datasources
You can define many datasources as you want. But you can control which datasource can be pulled by Trigger Condition. For example: you want to pull data as Static Datasource when queryparams.name=static and data as Query Database when queryparams.name=null
Performance
LET Portal allows you to make many datasources as you want. However, we are running on client-side so we recommend you to have at most three datasources. Also you need to check Trigger Condition to prevent some unexpected cases. If you aren't sure this datasource is acceptable, you can deactive this.
See more on State Management
Events - Linking Section Events
There are nothing is different of Chaining Events mechanism. On page level you can define a trigger control from one section to another section. But there are many important notes on the current version below:
- We can't perform
action event typeto change a control value of another section.Action event typeis working only within one section - We can trigger
refetchaction on Dynamic List through another event on Standard - Chart still doesn't have any
action event