Standard Array
The documentation applies to: v0.8.0
Preparation knowledge
We prefer to read all documents below before you read through this section.
Standard Array Options
Standard Array is using the same builder page with Standard Component. So that you go to Standard Builder page for starting Standard Array.
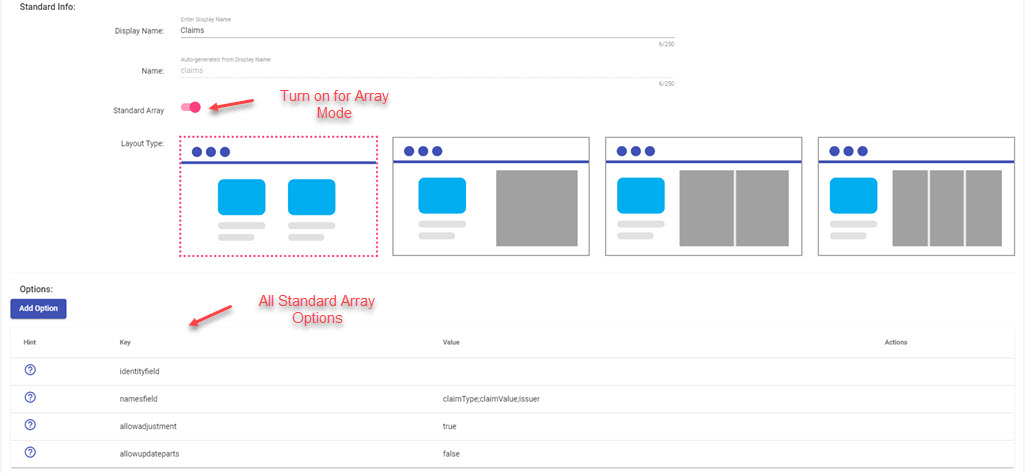
First and foremost, you need to turn on a slide Standard Array as a screenshot below on Standard Builder Page

There are four options for Standard Array
| Option Name | Value type | Default value | Description |
|---|---|---|---|
| identityfield | string? | id | It is a name of control which used to indicate a unique data on array |
| namesfield | string? | name | It contains multiple name of controls, separate by ;. It indicates which controls will be used to appear on array. Ex: name;email |
| allowadjustment | boolean | false | If true, user can perform add/edit/remove any data on array |
| allowupdateparts | boolean | false | See here |
Intergration on Page
Same as any Section type, Standard Array can be added via Page Builder page. However, there are some limitations with Standard Array:
- Don't support page events, that means you can't configure linking section events
- Only support array type of datasource
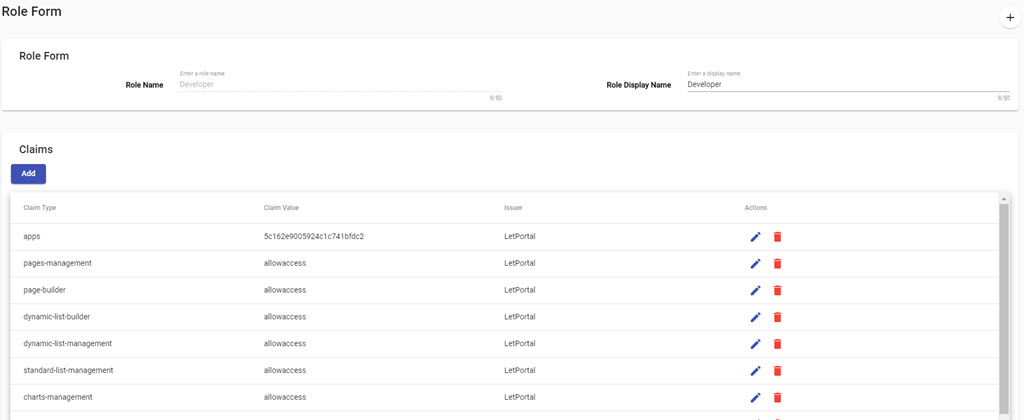
After you add Standard array, a page will look like

We will highlight some important notes on Page when you add Standard Array
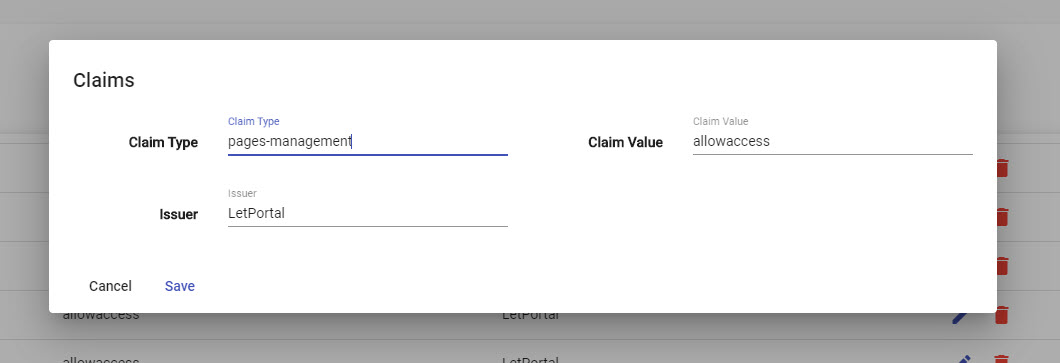
Dialog for Add/Update
We keep the same mechanism of Standard Component, that means a rendered dialog will be rendered a Standard Component and all controls can active chaining event. However, they can't active link section event on Page. By default, we don't let user touch on Standard Array, you need to change allowadjustment to true
Note
We don't define a feature which is turn on/off Add, Update, Remove separately.

Remove children then add new
A first way you come to structure your data with tightly relationship between parent and chilren. It is a formal way nowaday for circumstances, it reduces many constraints between chilren and their external references. If you have a plan to go with this design, you need to changeallowupdateparts to false.
In this setup, we will create a data with structure below
```json tab="Initial data" { "data": { "standard_array_name": { "inserts": [ { // Array data } ], "removes": [ { // Array data } ] } } }
```json tab="Example"
{
    "data": {
        "claims": {
            "inserts":[
                {
                    "claimType": "apps",
                    "claimValue": "core-app"
                }
            ],
            "removes": [
                {
                    "claimType": "apps",
                    "claimValue": "core-app"
                }
            ]
        }
    }
}
Each time user performs any action such as add, update or remove any child, LET Portal will help you to maintain these groups inserts and removes. Your mission is only set up two database commands are INSERT and REMOVE.
For example: you want to perform REMOVE first and then INSERT second on SQL Server.
```sql tab="DELETE command" DELETE FROM claims WHERE ClaimType="{{data.claimType}}"
```sql tab="INSERT command"
INSERT INTO claims("ClaimType","ClaimValue") Values ("{{data.claimType}}", "{{data.claimValue}}")
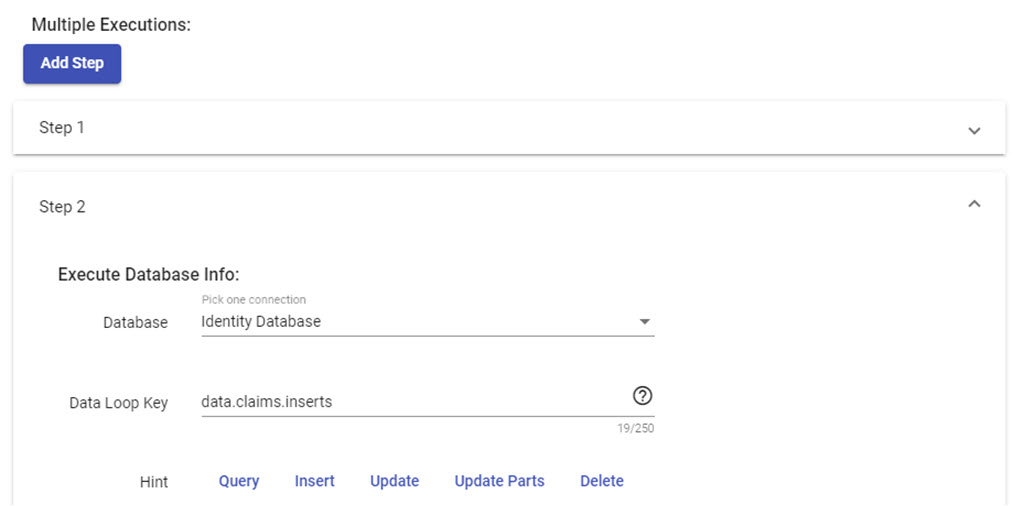
Let's take a look on Execution Database, we have a new field called Data Loop Key. It helps to indicate with data must be loop.

Note
Once again, data keyword is used to indicate one child data on array of Data Loop Key. So keep in mind, data is just a keyword for referencing a bound data
Update parts instead of removing all
A second way you come to structure data on parent-children relationship. It isn't formal and tend to fade nowaday. However, it is still working on many systems that require tight constraints between children data and their external references. So that it is hard to remove all and then add, only update with flag isDeleted to be true on table. If you have a plan to go with this design, you need to change allowupdateparts to true.
In this setup, we will create a data with structure below
```json tab="Initial data" { "data": { "standard_array_name": { "fresh": [ // Array data from datasource ], "inserts":[ // Empty on initial ], "updates": [ // Empty on initial ], "removes": [ // Empty on initial ] } } }
```json tab="Example"
{
    "data": {
        "claims": {
            "fresh": [
                {
                    "claimType": "apps",
                    "claimValue": "core-app"
                }
            ],
            "inserts":[
            ],
            "updates": [
            ],
            "removes": [
            ]
        }
    }
}
Each time user performs any action such as add, update or remove any child, LET Portal will help you to move one item on fresh array to correct group inserts, updates or removes. At the end of this state, when user submits, you will have three groups for creating three commands: INSERT, UPDATE and REMOVE. All remaining items on fresh group are untouched.
For example on SQL Server.
```sql tab="DELETE command" DELETE FROM claims WHERE ClaimType="{{data.claimType}}"
```sql tab="INSERT command"
INSERT INTO claims("ClaimType","ClaimValue") Values ("{{data.claimType}}", "{{data.claimValue}}")
```sql tab="UPDATE command" UPDATE claims SET ClaimValue = "{{data.claimValue}}" WHERE ClaimType = "{{data.claimType}}"
Same with the first way, you need to fill `Data Loop Key` on Execution Database.

## Access Parent data

You can access parent data by `parent` keyword. For example:

```json tab="Data"
{
    "data": {
        "roleId": "abc",
        "claims": {
            "inserts": [
                {
                    "claimType":"apps",
                    "claimValue":"core-app"
                }
            ]
        }
    }
}
sql tab="Database command"
INSERT INTO claims (claimType,claimValue,roleId)
Values("{{data.claimType}}", "{{data.claimValue}}", "{{parent.roleId}}")
Limitations
Due to a complexity business, LET Portal still has some limitations for Standard Array:
- Don't support evaluted condition on Route of button
- Don't support setup condition on each step of Execution Database. For example: If
insertsis empty, you want to performupdatesinstead - Don't support link section events